

Got this light with the intention of mechanical & cosmetic modification.
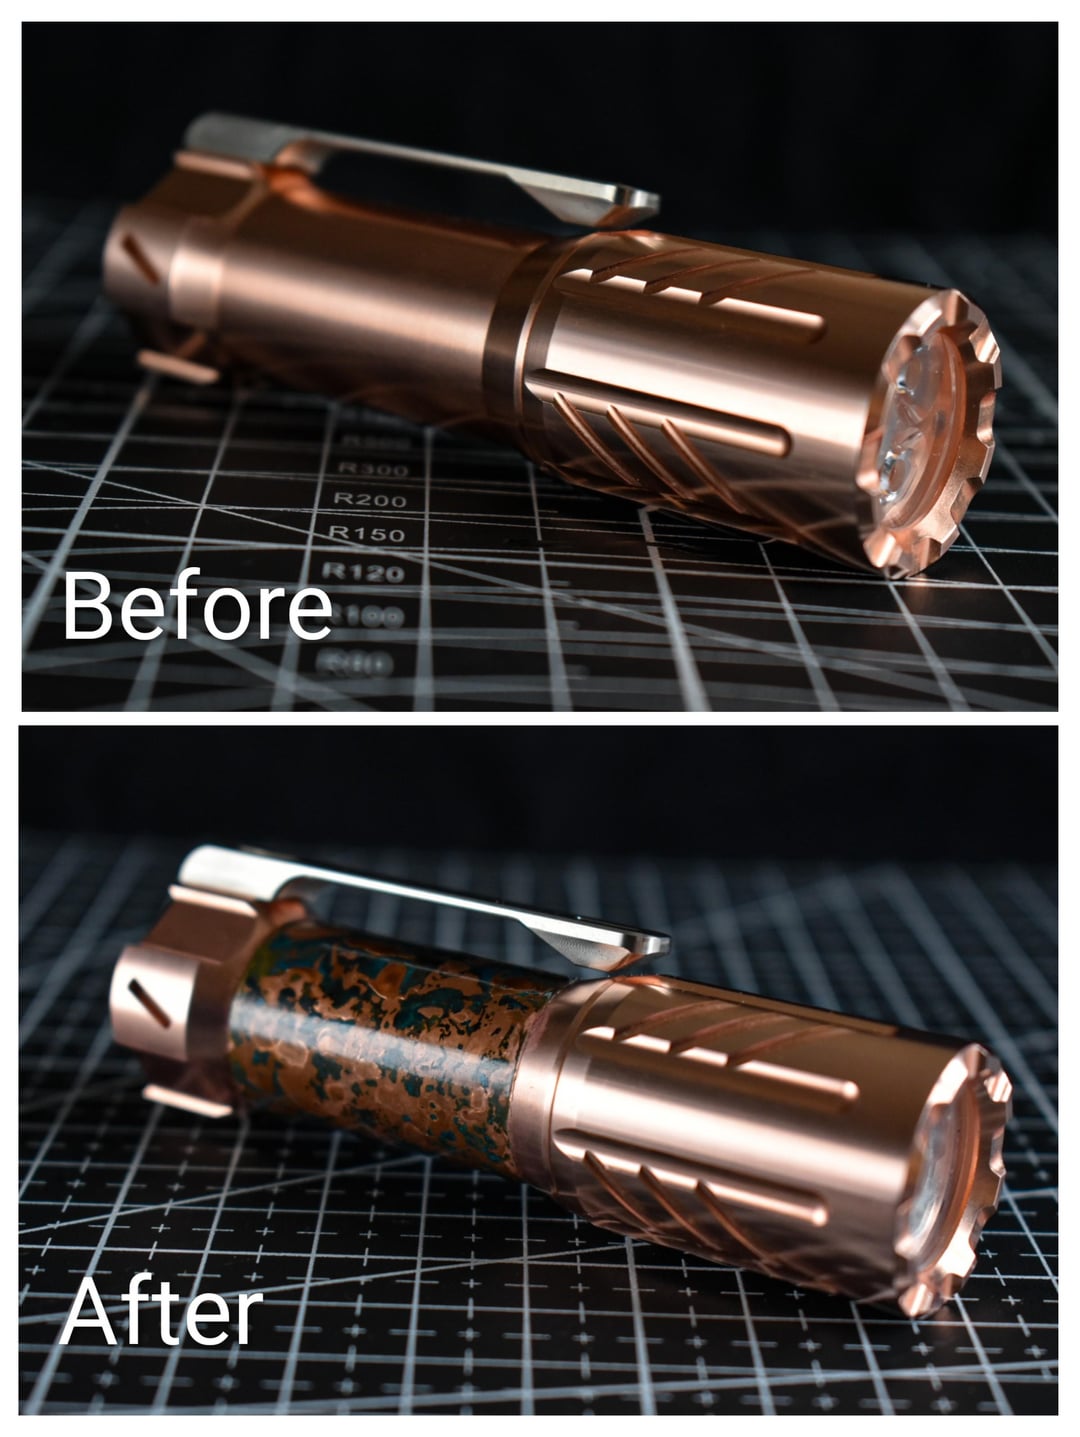
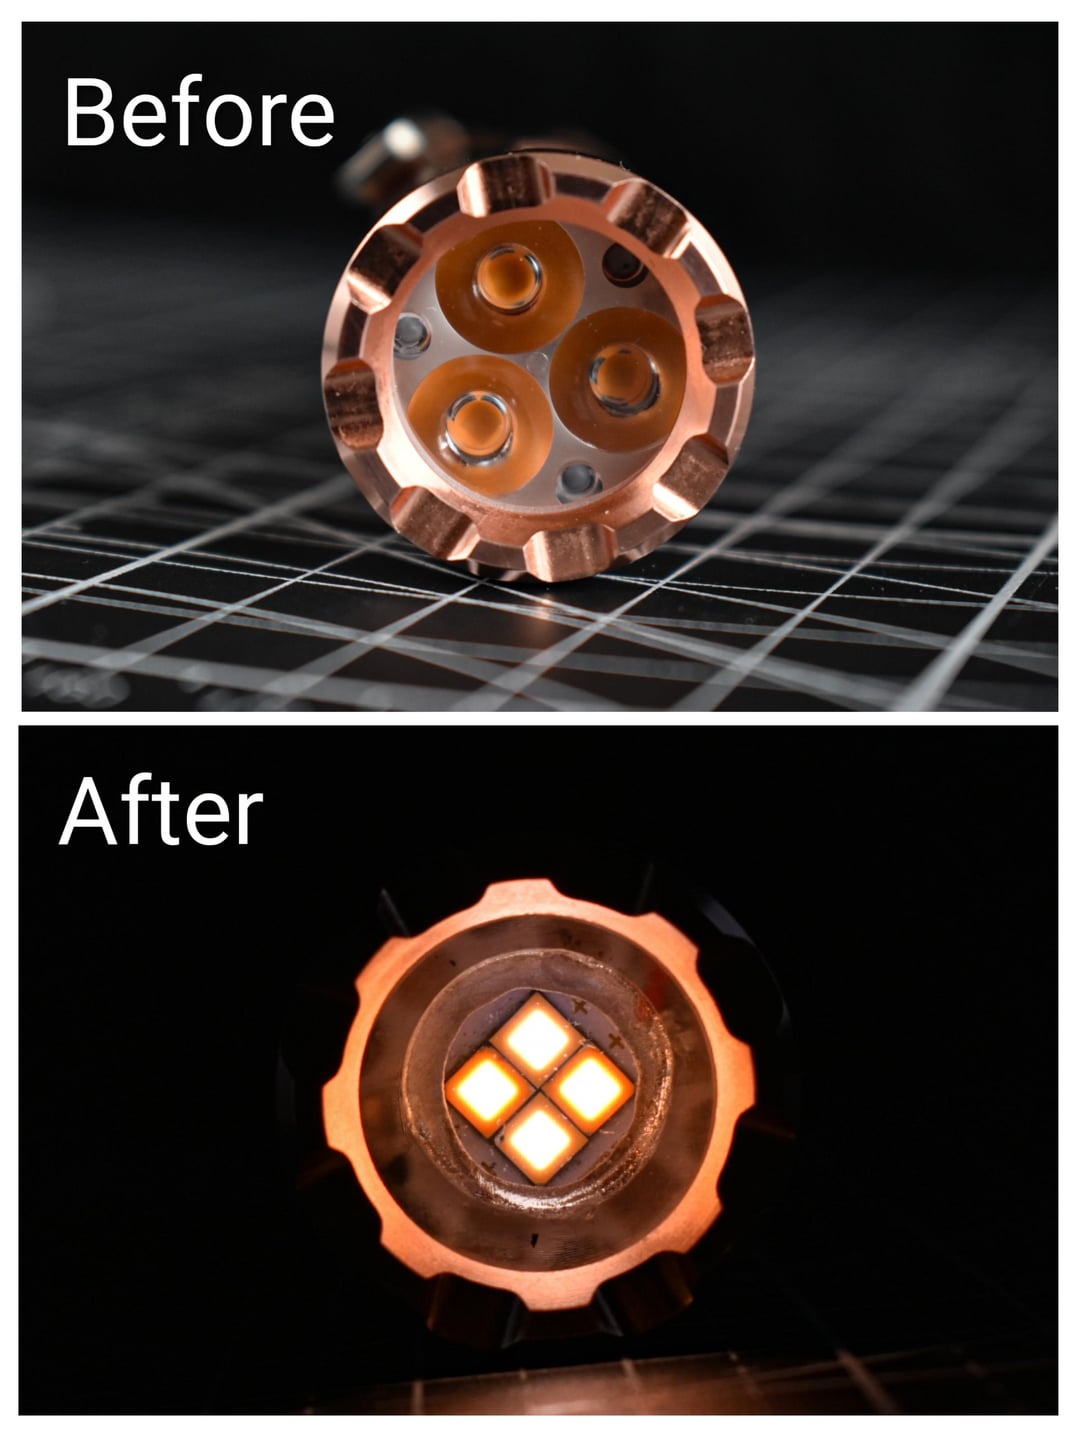
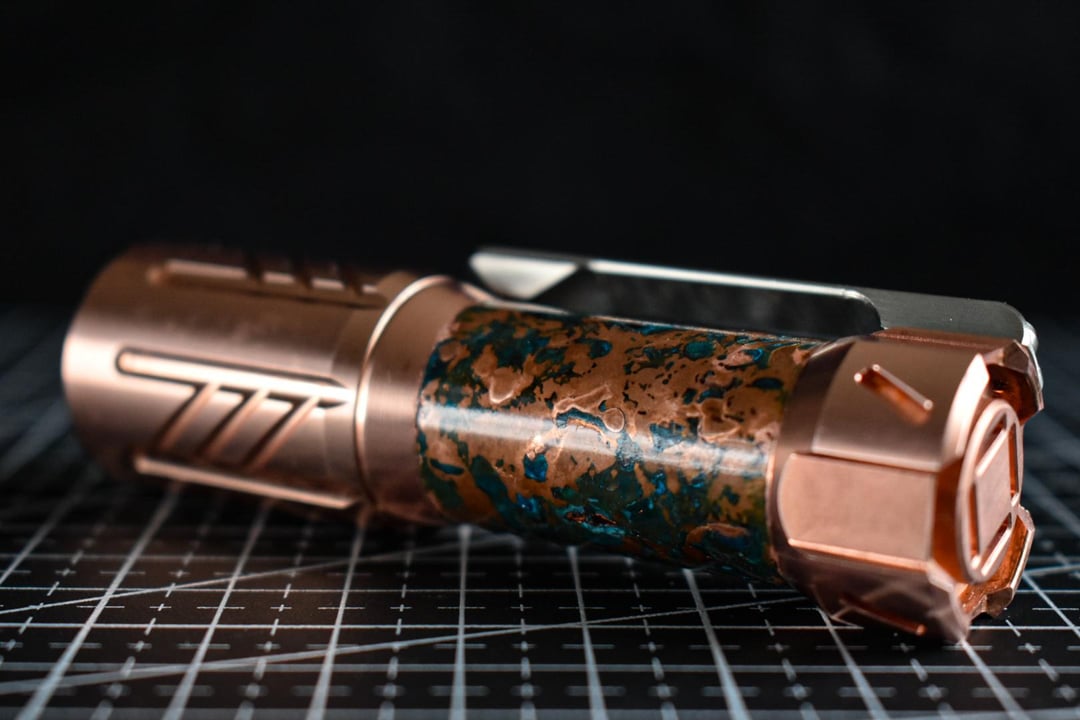
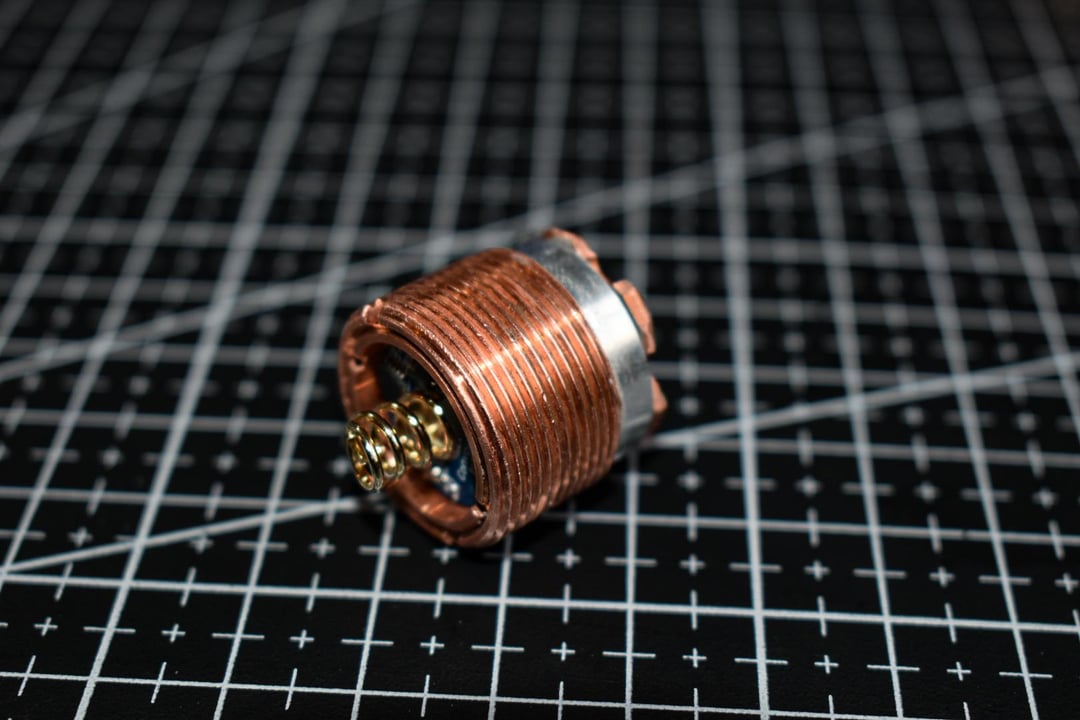
Lets start with the original light – This is an 18350 light & comes with a 18350 Type-C battery. Full copper construction, nice clean machining & finish on the body, if perhaps a little sharp on the tail. Tail switch button at the backend is not particularly well fitted, it's 'wobbly' but works just fine. Up front I went for the Triple FFL351A 4000k. Unsure of the triple optic used, it's not listed in the details. The light uses a removable pill to house a 17mm driver, the type of driver is not listed in the details either, & a triple 3535 20mm MCPCB (diameter is in fact slightly less than 20mm, this becomes important later on). UI is similar to that of Reylight & Convoy, easy enough to figure out & set to the preset levels you want.
So the original light from the triple was not bad at all, in my virgin to optics opinion 😅 Good throw & decent amount of spill. As mentioned, the switch button is a bit wobbly, but changes through the brightness levels without fault & gives that satisfying click when switched on/off! It's a heavy little flashlight, as expected, but feels good in hand… If you don't mind the sharpness from the machining on the tail. Overall, it's not perfect, but looks good & shines decent light from one end when you click the other 😜
On to the mods – Knew I wanted to Mule this light, so went with a quad FFL351A 3700k + 1800k. The actual size of the original MCPCB, & pill recess, is slightly under 20mm, so a standard 20mm MCPCB will not fit within the pill recess. This also means that a 20mm mule spacer won't fit either. There were a few options on how to sort this, but I chose to remove the pill lip, which was rather thin, so a 'bit' of hand sanding got it gone. The original driver leads came up through the centre. Fortunately, the original MCPCB was screwd into the pill, so I drilled out the tapped holes in the pill to make them large enough for the new driver leads. I then fitted a Convoy 3v 8A Buck Driver, no fitment issues with this. I made a 4mm aluminium spacer to bring that Cree quad MCPCB up close to the lense. A modified resin gasket sits around the LEDs & holds the lense in place. However, on the first attempt to screw the fully assembled pill in, the 'corners' on the Cree star MCPCB hit the internal thread of the light & would not allow the assembly to screw in! So, I used some wire cutters to clip the 'corners' off & a small metal file to clean them up. I obviously ensured I was clear of any traces & then tested for shorts, all was good 👌🏻 I left the original tail switch in. Finally, I put a standard flat top 18350 (Vapcell M11) into the battery tube & switched it on 😎
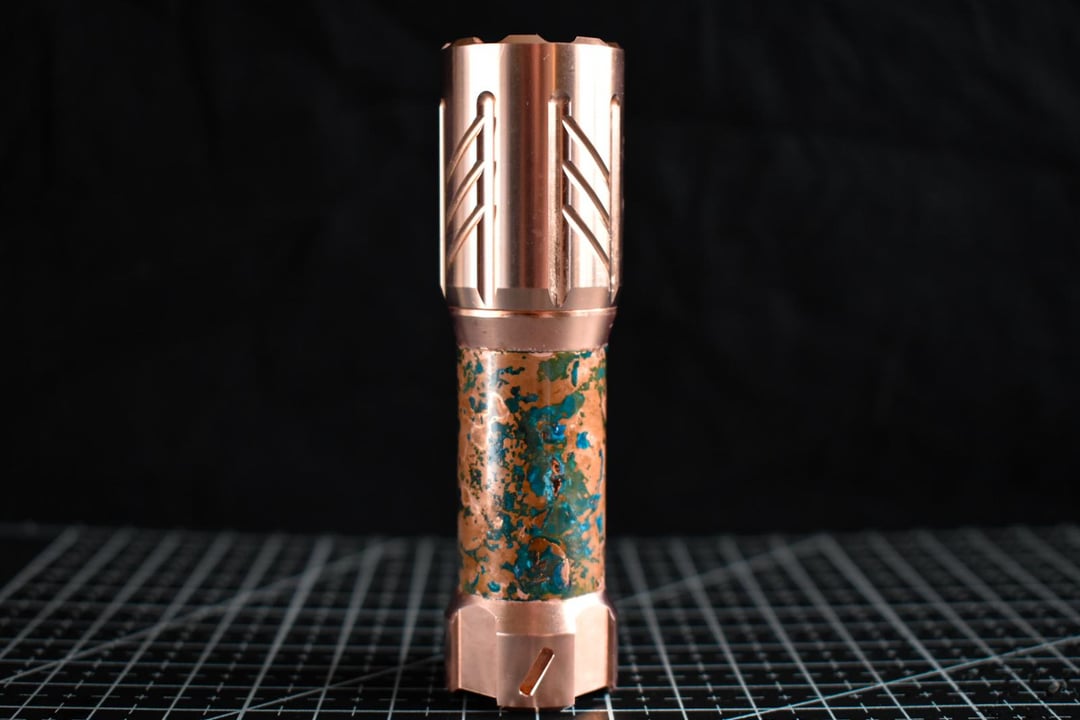
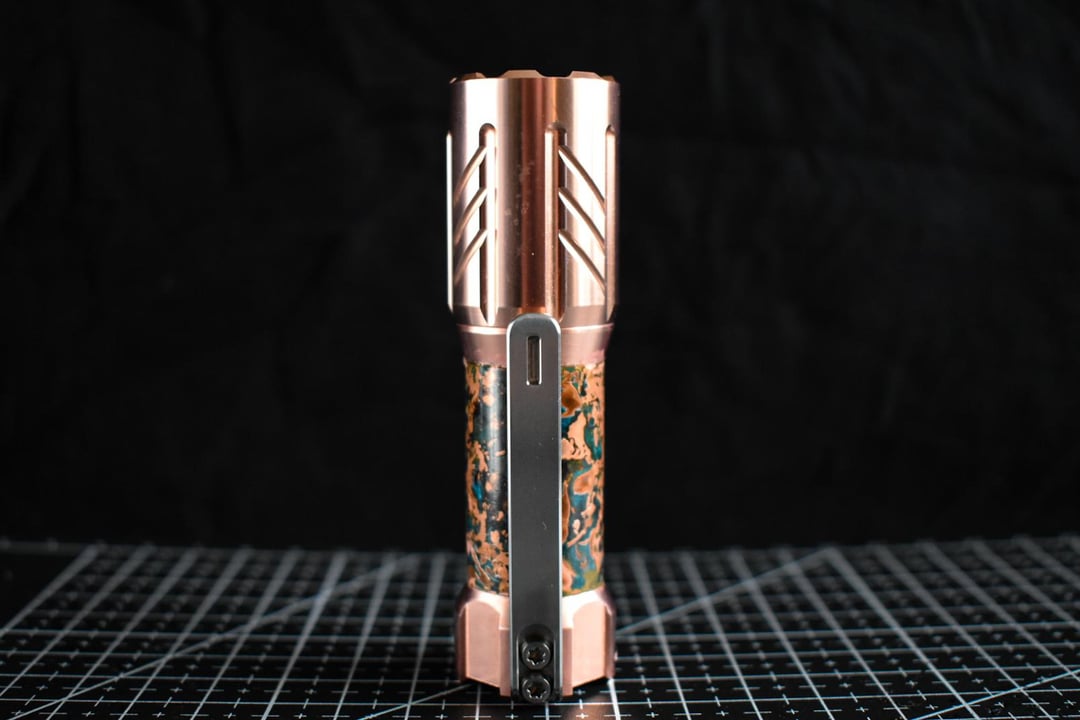
The cosmetic mod was my first attempt at shipwreck patina! I decided to just do the smooth straight section of the battery tube. What I learnt was that I need better tape to mask off sections I don't want effected by the forced patina process. I had some seeping & darkening of the sections I'd taped off. The darkening was easily removed using ketchup, but a couple small patches of etch remain. The shipwreck patina itself came out lovely! I left it in for 12 hours. I then clear lacquered the shipwrecked section only as I want the rest of the copper body to patina naturally.
It's performance as a mule is okay, however the bezel is tall and the host is small, so regardless of the LEDs being central on the MCPCB, the light is disrupted by the bezel, which creates artifacts around the edge of the 'beam'. I kind of expected this, so am not overly concerned by it.
Overall, I really like the way it turned out, both the mule & patina, and this light will stay in this configuration now 👌🏻
Thanks for looking 👊🏻
by Unlucky_League_8832

 Fraz Labs QT-L Nugget")

3 Comments
It looks spectacular, thanks for the detailed post with the explanation and the photos! Great job, mate!
That’s for the write up! Been meaning to seal the driver in this light because the original ones are really under powered. It’s a shame it’s not a drop in at 20mm.
Looks great – well done! 🔥